Enabling Scheduled Jobs on QueueMetrics-Live

Scheduled Jobs
A lot happens in your call center everyday, and it’s often hard to keep track of how your agents are performing every day. Data collection can be a tiring job, and making sense of it all it’s even harder. Would you like to have detailed reports about your call-center performance, neatly organized and formatted as you choose them to be, delivered automatically to you by email at regular intervals?
If your answer is yes, then keep reading.
QueueMetrics
QueueMetrics is a highly scalable monitoring and reporting suite that addresses the needs of thousands of contact centers worldwide and offers a broad range of integrated benefits like agent productivity monitoring, target measurement, conversion rates tracking, realtime campaign statistics analysis and an easy to use interface. It’s available on premise or as a cloud hosted solution service www.queuemetrics-live.com.
In this tutorial we will explain how to enable the Scheduled Jobs feature on QueueMetrics Live.
Tutorial
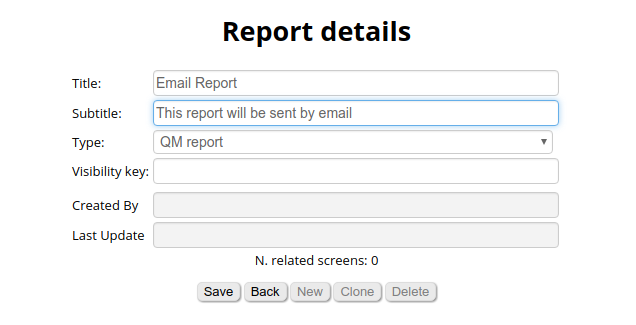
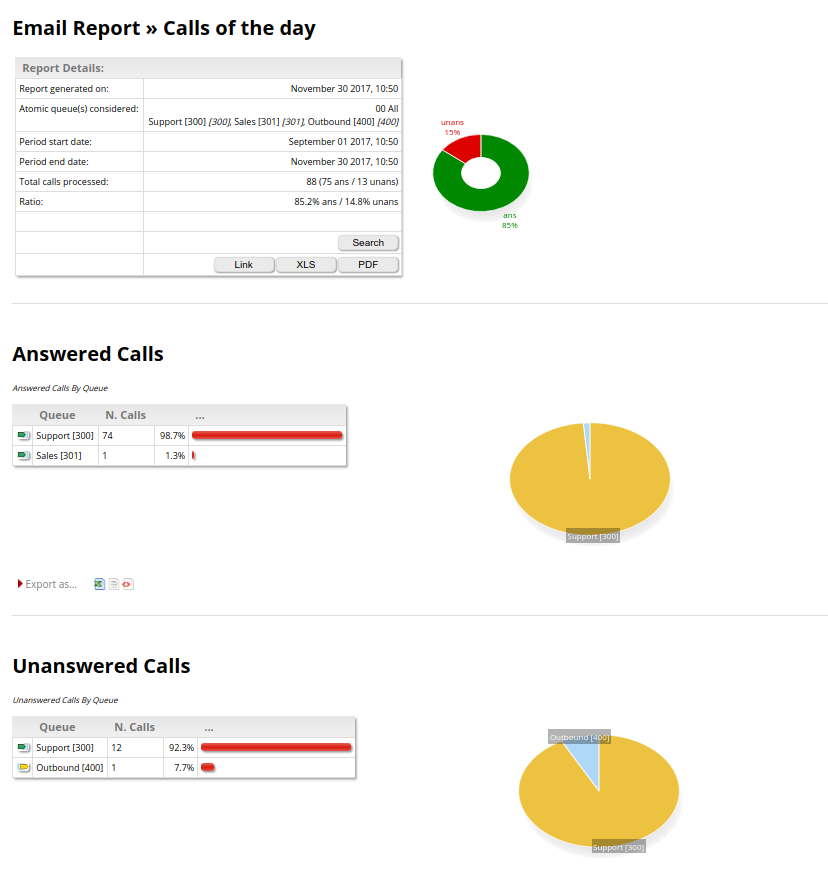
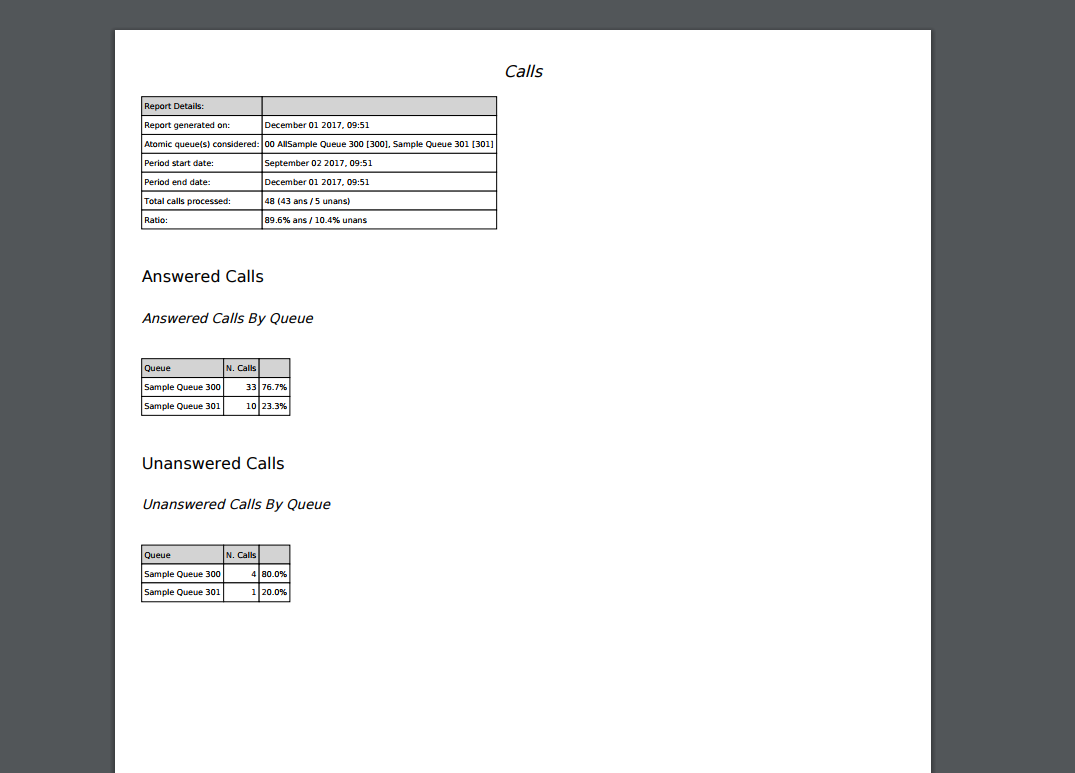
First of all, we need to create a report that we want to be sent to us regularly. From QM homepage we click on Reports -> Create New and fill out all the required fields.
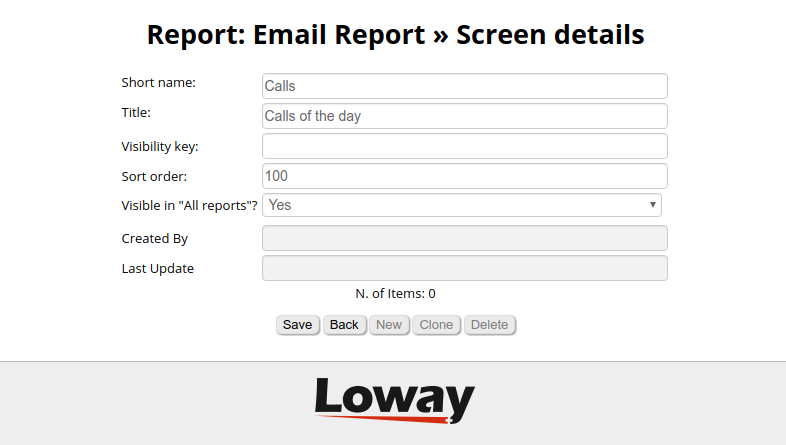
Now, reports are composed by screens, we go back to the Reports list and click on the blue name of our new report. This will take us to the screen creation page, where we will create a new screen called “Calls of the day”.
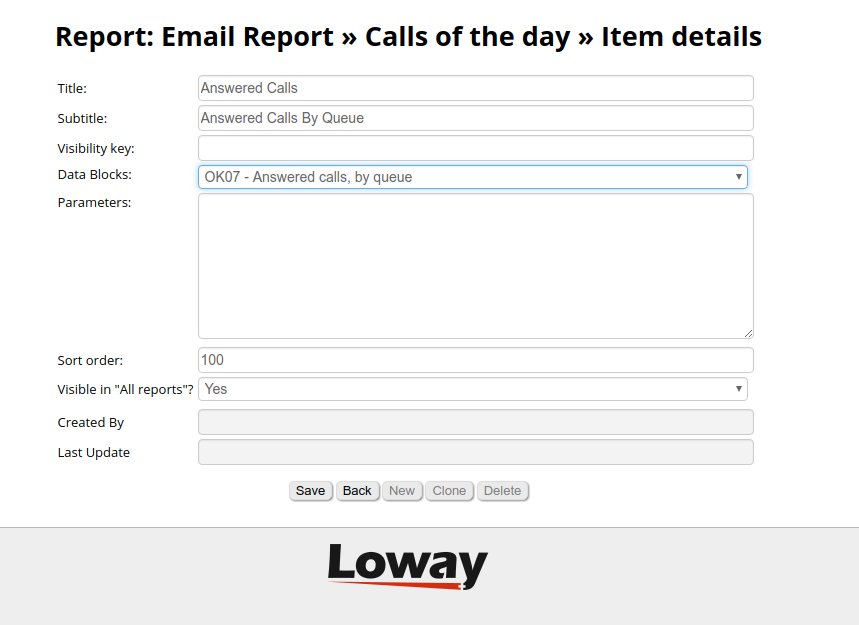
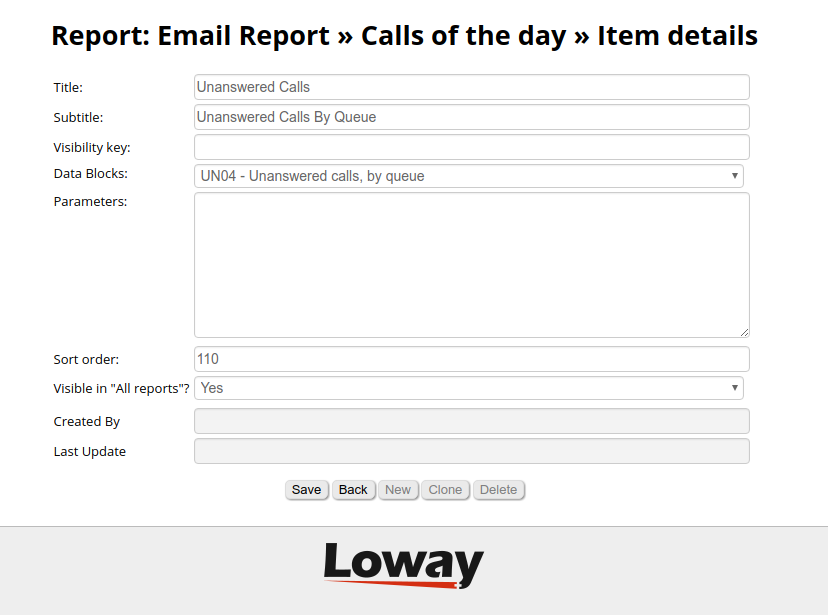
Each screen is made up of different Items (or Data Blocks). We go back to the Screen list and click on the blue Screen Title to open the Items list where we will create two new items.
Once we are done creating the items we want in our report, we can go back to the Homepage and launch the report by selecting it in the Report Dropdown at the top of the screen, right below the Queue Dropdown. Once we select the report and the queue we want to launch the report on, we can launch it by selecting a time period in the Quick Activity Reports section of the Homepage.
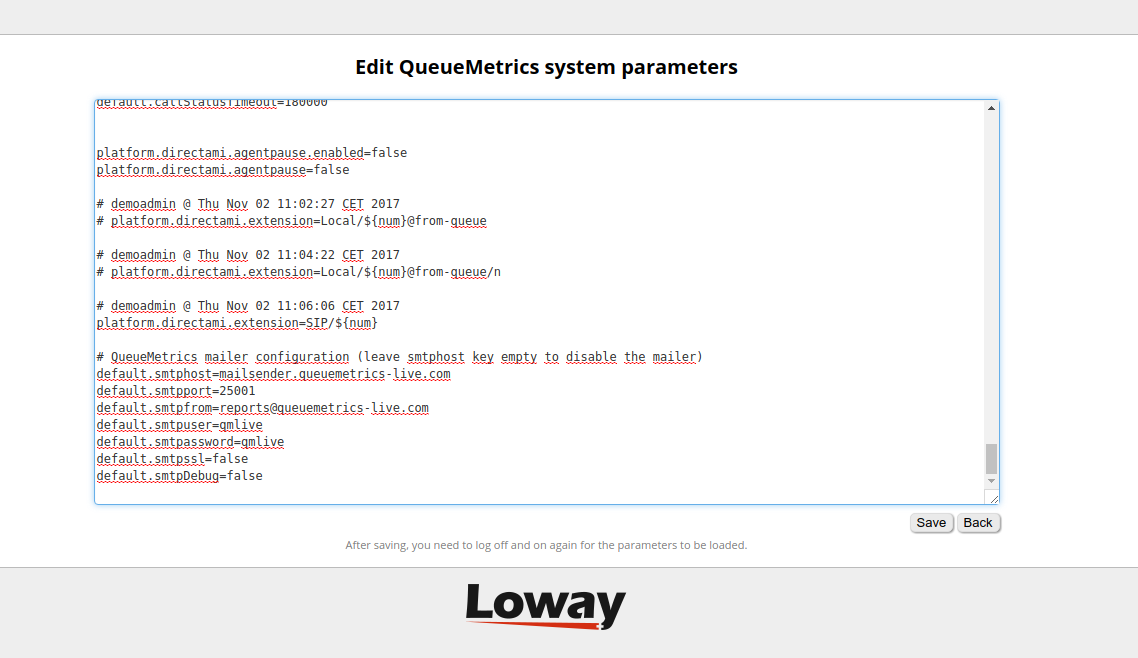
Now we have a brand new report. To actually send it though, we still need to specify the email addresses and the format of the attachment, but first we need to make sure we are using QM-Live’s SMTP server. To do this, from the Homepage we click on Edit System Parameters and scroll down to the end of the file. Here we add the following:
	# QueueMetrics mailer configuration (leave smtphost key empty to disable the mailer)
	default.smtphost=mailsender.queuemetrics-live.com
	default.smtpport=25001
	default.smtpfrom=reports@queuemetrics-live.com
	default.smtpuser=qmlive
	default.smtpassword=qmlive
	default.smtpssl=false
	default.smtpDebug=false
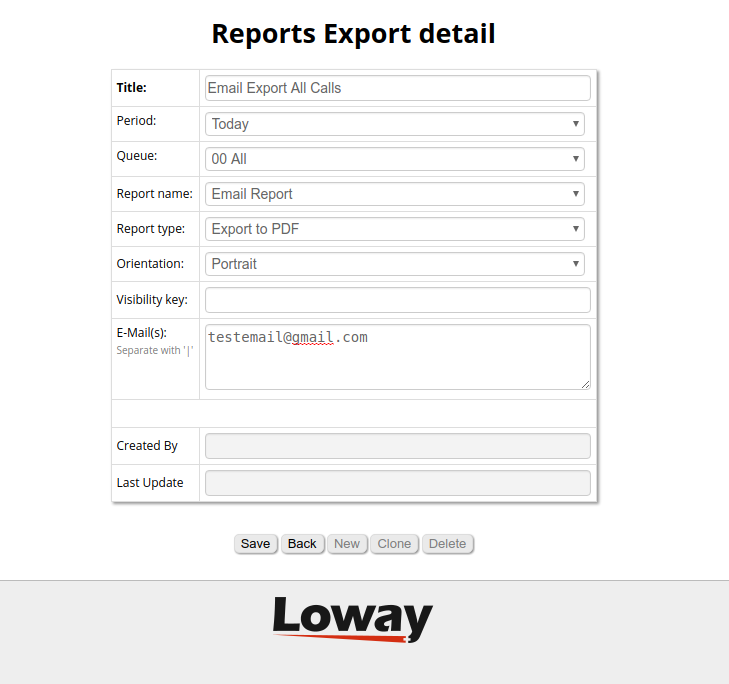
Now we need to create an appropriate Report Export Job. From the Homepage we click on Report Export Jobs -> Create New and fill up all the information.
Now we have a Report Export Job. If we want, we can launch it manually by clicking the job’s play button in the Report Export Jobs list. If Launched, the job will send the report to your email right away.
What we want to do though, is set up a Scheduled Job that takes care of that for us, and launches the job at an appropriate time of the day, without having to manually launch it every time we need it. To do this, we must make sure the user possesses the right User Key to use the Scheduled Jobs feature.
From the Homepage go to Users -> Show Classes and click on the edit icon (pencil icon) at the far right of the “ADMIN” class (Or whatever class is your administrator user).
This will open the User Class Editor. Here we simply click on the Wizard Hat Icon that will open the User Key Wizard, where we make sure we check the following.

Now, we just need to save, log out of QueueMetrics and then log back in again. Now we will see the Scheduled Jobs option available right above the Report Export Jobs option in the Homepage.
Here we can create a Scheduled Job by selecting a valid Report Export Job to launch, indicating when we would like to launch it.
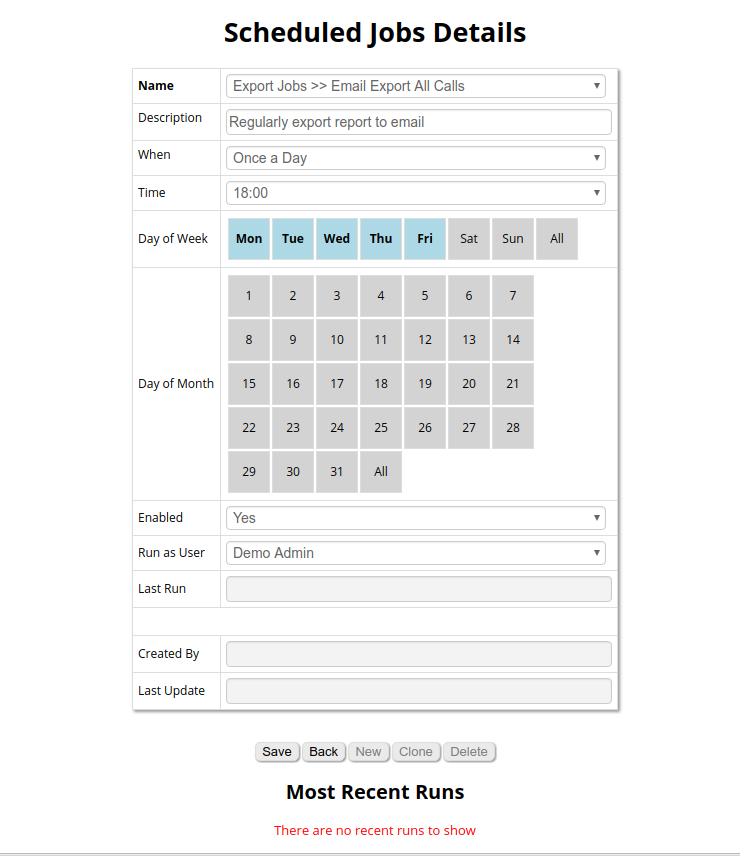
We can set the When option to Once a Day or to Cyclic. If Cyclic is chosen, the job will be launched at regular intervals, each long as much time as specified in the Every section right below.
If we choose one or more Day of the week or Day of the month, the job will be launched only on the specified day. If no day is specified the job will launch every day.
Lastly, Make sure Enabled is set to yes if you want your Scheduled Job to run. If at some point in time you want to turn a Scheduled Job off, you just set the Enabled option to no.
When everything is set up, the only thing we need to do is wait until the selected time arrives. We will then find in our emails our report waiting for us.
References
For more technical information about QueueMetrics call center solution please refer to the User Manual.
Visit www.queuemetrics.com for a 30 days full featured trial.
Attend our Free Webinars for a live demonstration of QueueMetrics.
keyboard_arrow_left Back