Troubleshooting: QueueMetrics Agents setup

QueueMetrics Agents setup
This tutorial follows the steps one needs to take to ensure that the agents in QueueMetrics are correctly setup, depending on the PBX configuration.
QueueMetrics is a highly scalable monitoring and reporting suite that addresses the needs of thousands of contact centers worldwide and offers a broad range of integrated benefits like agent productivity monitoring, target measurement, conversion rates tracking, realtime campaign statistics analysis and an easy to use interface. It’s available on premise or as a cloud hosted solution service.
Here you can find all the troubleshooting tutorials.
Tutorial
Agent configurations in QueueMetrics can vary, depending on the PBX setup. In this guide we go through the steps you need to take to ensure that your agents are correctly setup.
Initial Questions
Before we begin we need to ask ourselves a couple of questions:
Do we want our agents to be able to change extension number when they log in?
If the answer to this question is “yes”, then we want to enable hotdesking mode. If the answer is no we want to keep that disabled.
To enable/disable hotdesking in QueueMetrics, we need to change a single system parameter, in QueueMetrics “Edit System Parameters” page.
If set to something different than 0 enables the hotdesking. The value is interval time (in seconds) used by the analyzer to look back searching HOTDESK verbs in the queue log
Hotdesking disabled
default.hotdesking=0
Hotdesking enabled
default.hotdesking=86400
Do we want to use static agents or dynamic agents?
Do we want our agents to be able to log in and out of queues, when their extension is registered to the PBX? If the answer is “yes”, you want to use dynamic agents, otherwise you want to use static agents, that are “stuck” on the queues they are assigned on, with no possibility to log out.
We recommend using dynamic agents, as it allows for better tracking of agent activity, and a better integration with QueueMetrics’ functionalities.
To setup extensions as static or dynamic, you need to change your PBX configuration. Depending on the PBX the way to configure this step might vary, but here is an example.
What format are the extensions using on the PBX?
Different PBX setups show registered extensions differently, depending on the configuration. This is usually the most tricky part about agent configuration, and the most important thing to know.
Luckily it’s very simple to find out the extension format of your PBX, as described below.
1) Access your Asterisk CLI
2) use the queue show command:
queue show
This command will give you a breakdown of all the queues, with the relative registered extensions. Here you will see the extension format that your PBX configuration is applying.

in this example the extension format is:
Local/${num}@from-internal/n
where ${num} is the extension number. Other examples of extension formats might be:
- SIP/${num}
- PJSIP/${num}
- Local/${num}@from-queue/n
NOTE: If the queue show command show the agents name and last name, the extension format is usually noted right next to those, between round brackets. For example
John Doe (Local/200@from-queue/n)
In that case you only need to keep in mind the extension format shown in the round brackets, “Local/${num}@from-queue/n” in this example.
Configuring
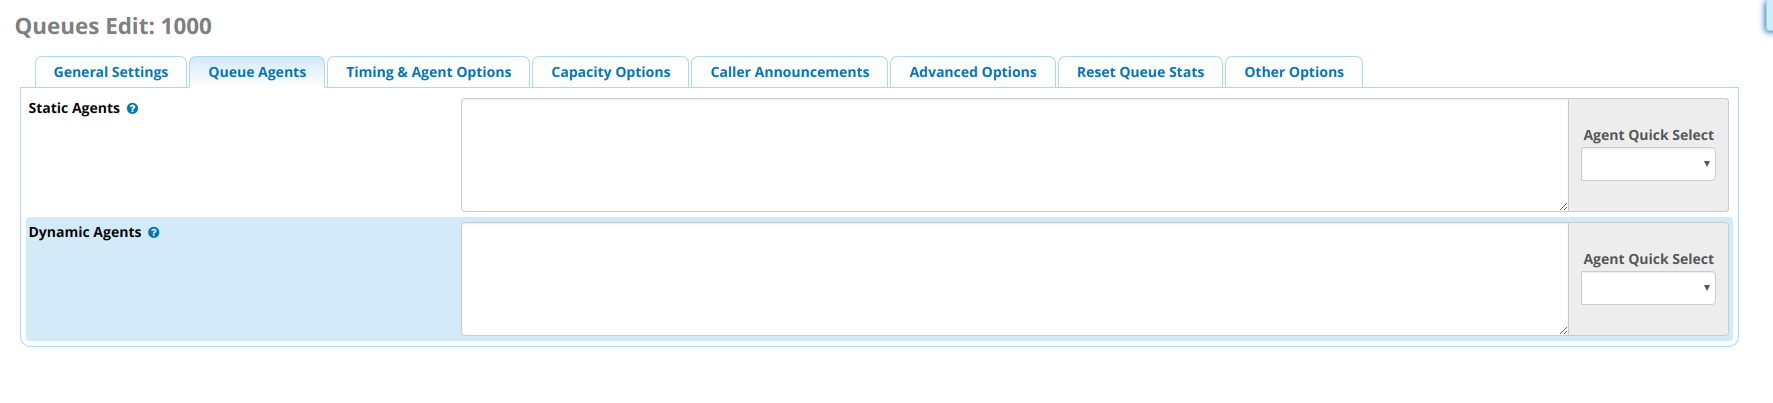
Configuring the agents (Non Hotdesking Mode)
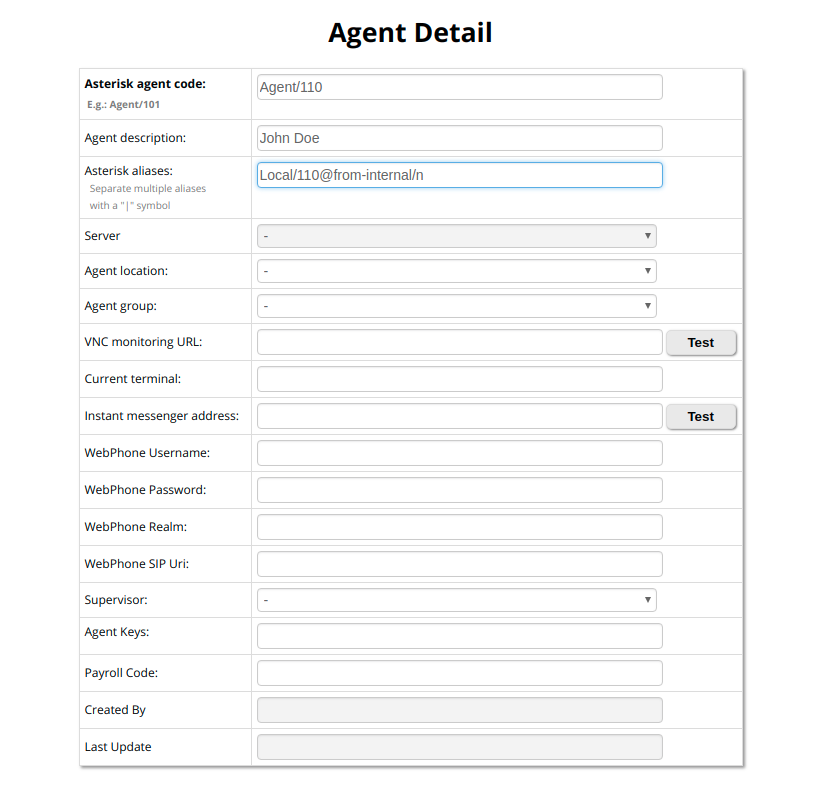
Now that we have answered the three questions above, we are ready to begin configuring our agents. The first step is to create an agent in QueueMetrics, by setting an agent code, a description and the Asterisk aliases for this agent.
The agent code needs to follow the Agent/xxx format.
The Description is the name that will appear in the Realtime page and the Reports.
An Asterisk alias is the aforementioned extension format, that QueueMetrics uses to link the extension to the agent we are creating. While the alias is not necessary to have if you are only logging your agents on queues through QueueMetrics, it’s always good practice to add this, so that QueueMetrics can cover all the situations where that agent might login through other means (for example via phone directly, using feature codes).
NOTE: Since we are not in hotdesking mode, the agent can only use the same extension number every time.
Configuring the agents (Hotdesking Mode)
The first step is to create an agent in QueueMetrics, by setting an agent code and a description. Since the agent can change extension numbers, we cannot set an Asterisk alias for it.
NOTE: Since the agents have to possibility to change extension number, this means that they can only login through the QueueMetrics agent page. The reason for this is that, when logging through the agent page, QueueMetrics writes a record that contains the link between that agent and the chosen extension. Without this record QueueMetrics is not able to link the agents and the extensions in hotdesking mode.
Configuring the users
To access QueueMetrics agent page, each agent needs a User account.
To create this, go to “Users” in QueueMetrics home page, and click on “Create New”.
We only need to set the following:
-
Login: Here we need to put the agent code from the agent configuration (Agent/110 in the previous example). This needs to be the same, so QueueMetrics knows that this user is linked to that particular agent.
-
Password/Confirm Password
-
Real Name: The name and last name of the agent.
-
Enabled: Must be set to “Yes”.
-
Class: Must be set to “AGENTS”, to enable the use of the agent page.
Configuring the AMI Command Format
When sending commands for an agent to Asterisk, QueueMetrics will send the command to a particular extension format. You have to define this format to be the same that is used by your agents.
To set this property, we need to head to the “Edit System Parameters” page from QueueMetrics’ home page.
If you are working with hotdesking disabled:
platform.directami.agent=YOUR_EXTENSION_FORMAT
for example:
platform.directami.agent=Local/${num}@from-internal/n
If you are working with hotdesking enabled:
platform.directami.extension=YOUR_EXTENSION_FORMAT
for example:
platform.directami.extension=Local/${num}@from-internal/n
NOTE: If you are still using Classic mode ( platform.pbx=CLASSIC ), then you will have to modify QueueMetrics dialplan directly instead of these properties. Please contact Loway Support for help on this, at support@loway.ch.
Configuration is complete
Congratulations, now your agents should be correctly configured. You can check this by trying to log-in log-out agents from the agent page, or by making a few calls on the queues and checking the realtime page and the wallboard. If you are still having problems, please follow chapter 1 of this trobuleshooting guide: “Sending data to QueueMetrics”:
https://www.queuemetrics.com/blog/2019/01/17/Troubleshooting-sending-data-to-queuemetrics/?lid=N110
Common issues
Here we present a few common situation that people encounter, when agents are not correctly configured.
Double agents, or strange agent names
If you see your agent names in the realtime page, preceded by “agent/” (So for example something like “Agent/John Doe”), this means that you didn’t add the correct Asterisk Alias to your agent configuration. Go back and follow the previous paragraphs about configuring the agents.
I cannot see any data in my Realtime Page
This probably means that Uniloader is not working correctly, in which case follow the previous troubleshooting chapter “Sending Data to QueueMetrics”:
https://www.queuemetrics.com/blog/2019/01/17/Troubleshooting-sending-data-to-queuemetrics/?lid=N110
If Uniloader is working correctly, make sure to create the correct queues in QueueMetrics, and that you have selected those queues in the queue menu at the top of QueueMetrics’ home page.
I have double records for each call
This probably means that you have two instances of Uniloader running at the same time on your PBX. You can check that with:
ps fax | grep uniloader
If you see two Uniloader process, please kill one of the two.
My agents are not receiving the commands I send through the agent page
Make sure that your AMI connection is setup correctly, by going to “Edit System Parameters” and editing the following property:
callfile.dir=tcp:amiuser:amipassword@pbxipaddress
for example
callfile.dir=tcp:queuemetrics:password@127.0.0.1
You can test AMI connectivity, by using the AMI Test under “System Diagnostic Tools”
QueueMetrics References
For more technical information about QueueMetrics call center solution please refer to the User Manual.
Visit www.queuemetrics.com for a 30 days full featured trial.
Attend our Free Webinars for a live demonstration of QueueMetrics.
keyboard_arrow_left Back