How to set up your QueueMetrics WebRTC Softphone in FreePBX using PJSIP
In this tutorial we will go through the necessary steps to setup the latest version of the QueueMetrics Softphone.
With the latest version we strongly recommend you switch to PJSIP extensions, following the recommendations of various PBX manufacturers.
QueueMetrics
QueueMetrics is a highly scalable monitoring software that lets you track agent productivity, payrolls, measure targets, conversion rates, ACD, IVR, Music on hold, generate outbound campaign statistics and monitor realtime processes with customizable wallboards.
You can measure all contact centre activities with more than 200 different metrics and manage realtime processes with extensions and calls control, live alarms, whisper mode, spy and barge mode.
Prerequisites
A QueueMetrics Live instance or a QueueMetrics on-premise installation (20.11.8 at the time of writing), with SSL configured.
If you are not sure how to setup SSL for your QueueMetrics on-premise, please follow our manual.
A valid SSL certificate should also be added to FreePBX’s Certificate Manager. A Let’s Encrypt certificate is a valid solution if you don’t know where to start.
To add a certificate to FreePBX, please follow the relevant documentation.
FreePBX Setup
TLS/WSS Setup
First of all, we need to enable WSS transport for PJSIP extensions.
To do this, navigate to Settings => Asterisk SIP Settings => General SIP Settings
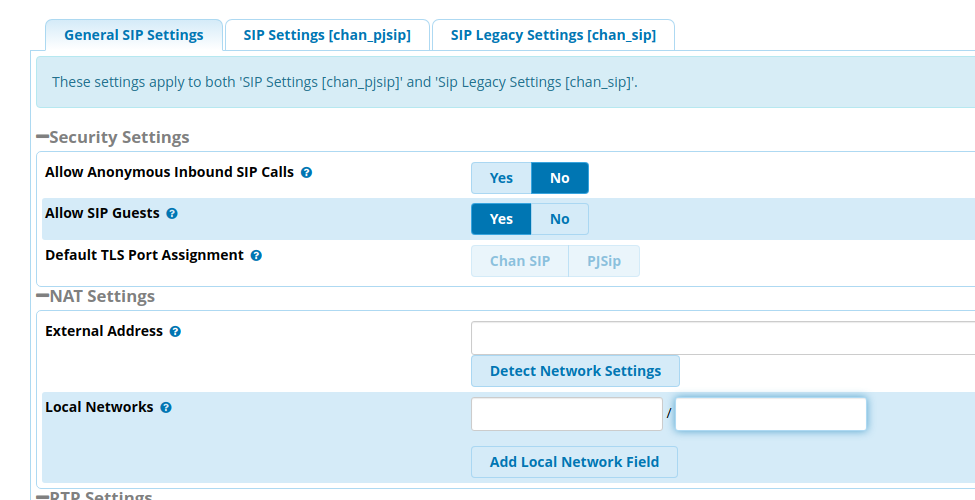
And make sure your NAT settings are correct (if any). You can use the Detect Network Settings button to automatically configure these settings.
Once this is done, navigate to the pjsip tab:
SIP Settings [chan_pjsip]
Here we need to specify that we want our PJSIP extensions to use TLS and set the transport protocol to WSS. We also need to specify the certificate we want to use to guarantee the connection.
First, let’s select the certificate mentioned in the prerequisites as the TLS transport certificate.
TLS/SSL/SRTP Settings => Certificate Manager
Then, down below, enable WSS transport.
WSS - 0.0.0.0 - All = Yes
Once you have done this, you can submit and save your changes.
Extension Setup
Let’s create a new PJSIP extension by navigating to
Applications => Extensions => Add Extension => Add New SIP [chan_pjsip] Extension

We set the Display Name and Secret for our new extension, then navigate to the Advanced tab.
Here, we need to set the following options:
| Option | Value |
|---|---|
| Enable AVPF | Yes |
| Enable ICE Support | Yes |
| Enable rtcp Mux | Yes |
| Media Encryption | DTLS-SRTP |
| Transport | 0.0.0.0-wss |
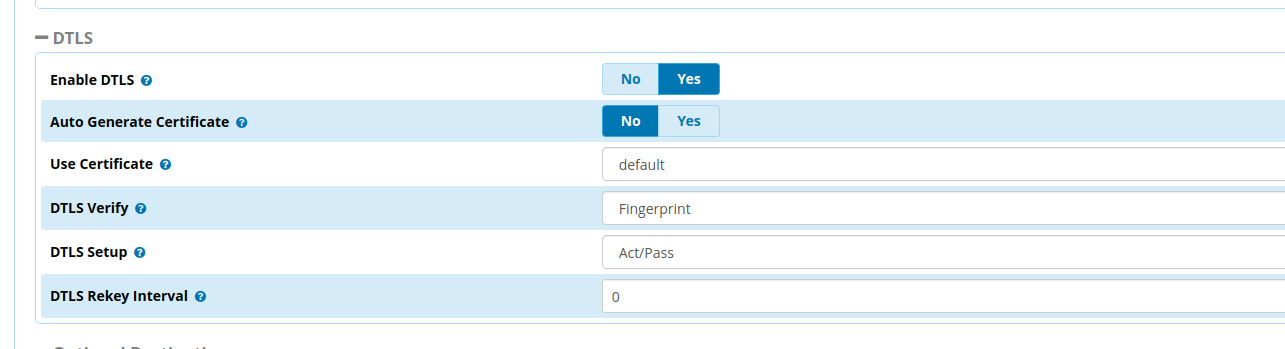
| Enable DTLS | Yes |
| Enable ICE Support | Yes |
| Use Certificate | The same certificate mentioned in the prerequisites |
| DTLS Verify | Fingerprint |
| DTLS Setup | Act/Pass |
| DTLS Rekey Interval | 0 |


Once we have done this, the extension is ready. We can then save and apply our changes.
QueueMetrics Setup
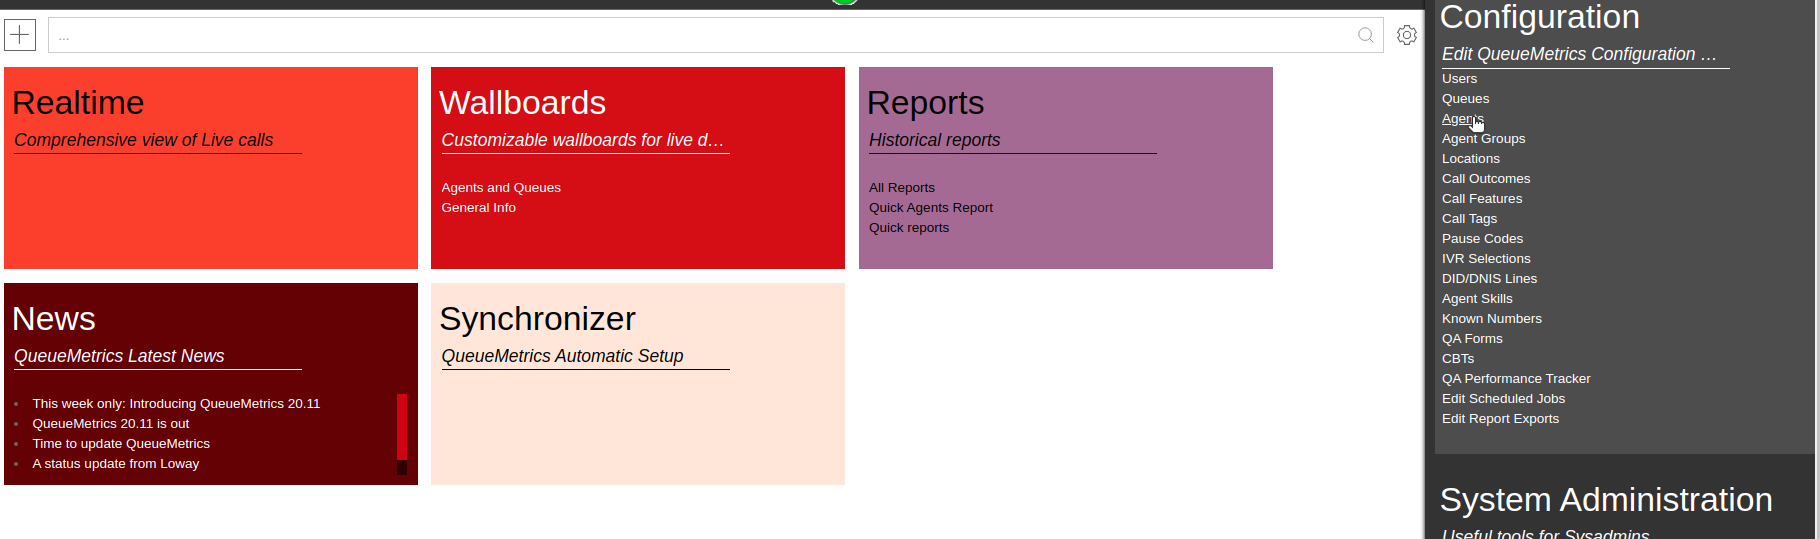
To Create and agent, linked to the Asterisk Extension we created earlier (100 in our case), go to Agents -> Create New.
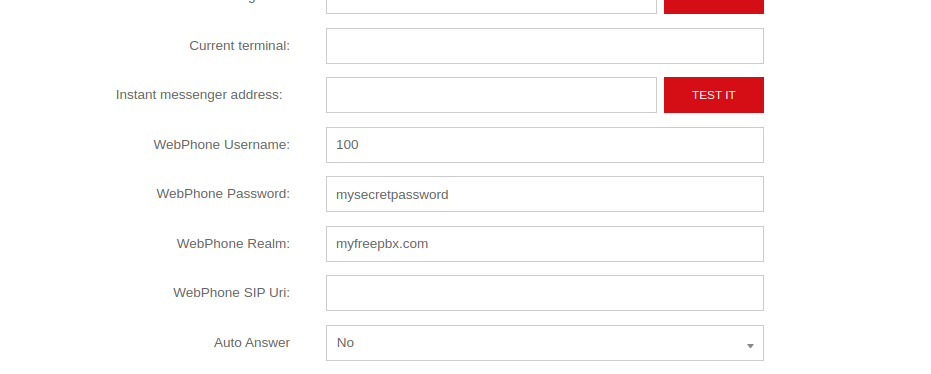
We call the agent Agent/100 and fill in the Agent Description field as we please. We then fill the following fields:
WebPhone Username with the extension username we previously set (in this case 100).
WebPhone Password with the extension secret we previously set (in this case mysecretpassword).
WebPhone Realm with the address of our FreePBX machine. (in this case myfreepbx.com).
We click on Save then go back to the Homepage.
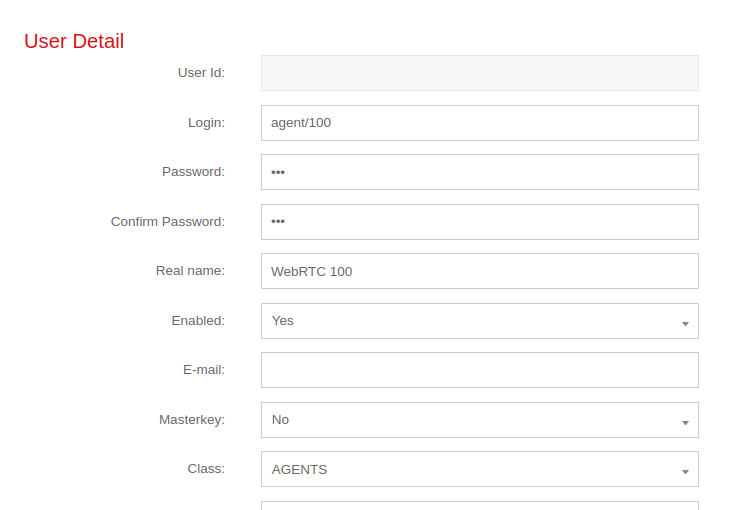
Now we need to create a User for Agent/100, so we go to Users -> Create New.
We set the Login field to 100, the Password to 100 and we set the Class field to AGENTS.
We click on Save and we go back to the homepage.
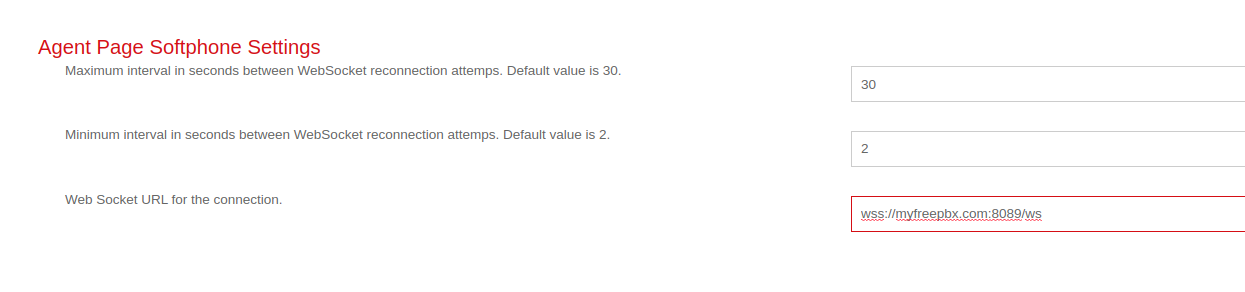
The last thing we need to do is to set one parameter in the Explore System Parameters page. Scroll down to the end of the page until you see the following parameter: Web Socket URL for the connection.
We need to set this, using the correct IP address for our FreePBX machine. Then we Save our file.
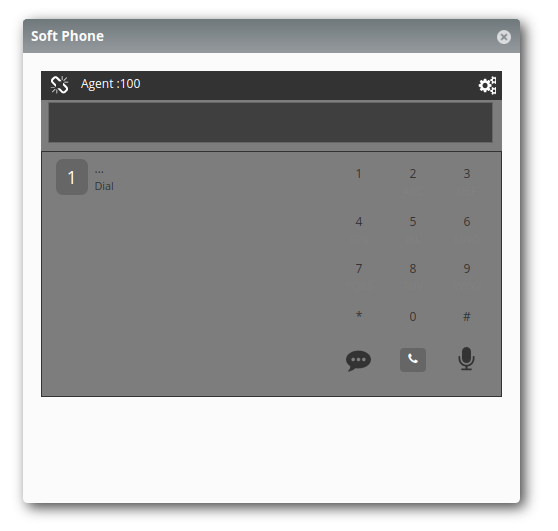
Now we’re good to go! We log out of our QueueMetrics Administrator Account and we login as Agent/100.
From the Widget Menu we select Soft Phone and here is our WebRTC client.
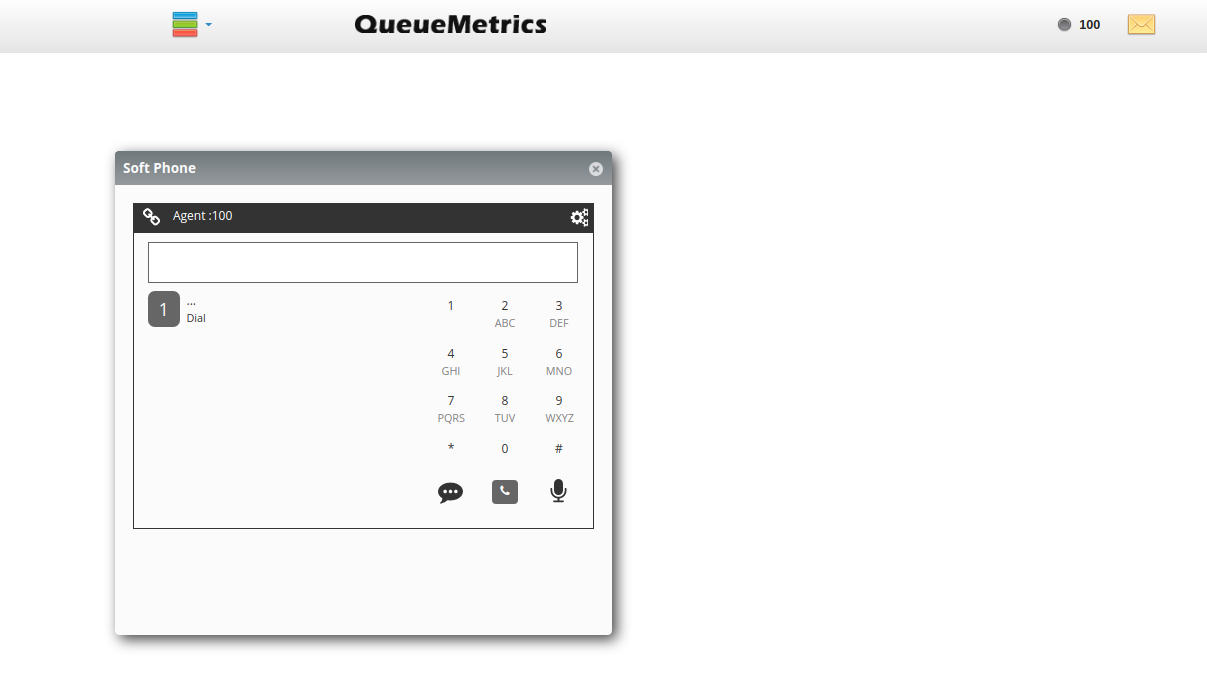
Now you can make and receive calls, as long as you give the webpage permission to use your microphone and headphones/speakers, when prompted.
Troubleshooting
The Softphone is not registering
If the softphone is unable to register with the PBX, it will look like this:
Usually this can happen due to various reasons:
1) The username or password for the extension are not correct
2) The PBX address is incorrect
3) The extension is a PJSIP extension, but the websocket is currently listening for SIP connections.
1 and 2 are easy to fix, as we just need to check all our settings again and make sure they are correct.
Number 3 is a fairly common occurrence, that can be fixed by following these steps.
NOTE: To fix this issue you will need to restart the PBX, so make sure you do this during an appropriate maintenance window.
Navigate to
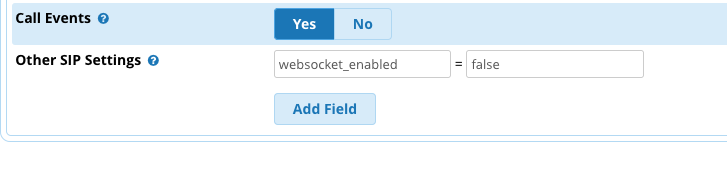
Settings => Asterisk Sip Settings => Chan SIP Settings => Advanced General Settings => Other SIP Settings.
and add the following value in the left field>
websocket_enabled
and this other value in the right field
false
Save, apply and then we will need to restart the PBX.
NOTE: This will interrupt the PBX operations so make sure you are outside of production time
asterisk -rx 'core restart now'
Now the PBX should have PJSIP listening on the WSS WebSocket.
Refresh the agent page and check if the phone is now able to register correctly.
The Softphone is registering but calls hang up immediately
This can happen if the browser does not have access to the Microphone or the Speakers/Headphones.
Make sure you have assigned the permissions correctly, and that you do not have another tab in the same browser that is currently using the Microphone.
Another reason for calls hanging up immediately, could be that the extension settings regarding AVPF, encryption and the like, specified in this tutorial, have not been set correctly.
The Softphone can make calls, but no audio is heard
This is usually due to NAT settings. If your PBX has NAT enabled, we need to set at least one ICE Server(STUN) to make sure that the audio streams are exchanged correctly. To do this we need to first choose a STUN server, for example:
stun.l.google.com:19302
and add it to both the Softphone configuration in QueueMetrics, and FreePBXs SIP configuration.
To set it in QueueMetrics, go to Explore System Parameters and set the List of ICE Servers to use. parameter under Agent Page Softphone Settings (if you are using the SoftPhone from the Wallboard page you will need to edit the same setting under Wallboard Softphone Settings.
once you find the correct option, set it to:
stun:stun.l.google.com:19302
Save and go to FreePBX’s GUI. Here we need to navigate to Settings => Asterisk Sip Settings => General Sip Settings => Stun Server Address
and add the server like this:
stun.l.google.com:19302
NOTE: In QueueMetrics you need to prefix the server with “stun:”.
Save and apply your changes in the PBX, and reload the agent page. You should now hear audio on your calls.
QueueMetrics References
QueueMetrics software is available on premise or as a cloud hosted service for FreePBX, Yeastar S PBX, Grandstream, Issabel, FusionPBX and many other Asterisk distros.
For more technical information please refer to the User Manual.
Visit www.queuemetrics.com for a free 30 days full featured trial.
Attend our Free Webinars for a live demonstration of QueueMetrics.
keyboard_arrow_left Back