Uploading call data (Uniloader configuration)

Uniloader is a service that needs to be installed on the PBX machine. This service continuously scans the queue_log file, where the PBX writes call logs and queue events.
QueueMetrics needs that information to monitor your call center, making the correct configuration for the Uniloader service crucial.
Uniloader configuration guide, on how to upload data to the cloud or the on-premise solution
Uniloader configuration, on premise
In our previous guide of the series, QueueMetrics installation on FreePBX 16), we tackled the installation of the Uniloader service, now it’s time to configure it for the on-premise version of QueueMetrics.
We will start by editing the following file on your PBX server:
/etc/sysconfig/uniloader
QUEUELOG=/var/log/asterisk/queue_log
# QUEUELOG="/var/log/freeswitch/queue.log"
LOGFILE=/var/log/asterisk/uniloader.log
LOCKFILE=/var/lock/subsys/uniloader
PIDFILE=/var/run/uniloader.pid

# Local QueueMetrics instance
URI="mysql:tcp(127.0.0.1:3306)/queuemetrics?allowOldPasswords=1"
LOGIN=queuemetrics
PASS=javadude
TOKEN=P001
NOTE: if QueueMetrics is installed on the same server as your PBX, simply replace the content of the file, with the above configuration; otherwise change the IP address from “127.0.0.1” with the QueueMetrics server IP address.
“LOGIN” and “PASS” are already set with the default username and password for the QueueMetrics database. (usually you don’t need to change them)
The “TOKEN” allows you to change the partition where the Uniloader service will write the logs, in the QueueMetrics database. In almost all cases, the default “P001” is preferred.
Save and exit the file editor.
Restart the Uniloader service with:
service uniloader restart
NOTE:
Data can be sent trough HTTP (or HTTPS) as well, on the on-premise solution. Sometimes this might be preferred.
You can find out more in this tutorial
Uniloader configuration, QueueMetrics-Live (hosted solution)
Just like for the on-premise solution, we will start by editing the Uniloader configuration file on the FreePBX server:
/etc/sysconfig/uniloader
QUEUELOG=/var/log/asterisk/queue_log
# QUEUELOG="/var/log/freeswitch/queue.log"
LOGFILE=/var/log/asterisk/uniloader.log
LOCKFILE=/var/lock/subsys/uniloader
PIDFILE=/var/run/uniloader.pid

# QueueMetrics-Live
URI=https://my.queuemetrics-live.com/CHANGEME
LOGIN=webqloader
PASS=CHANGEME
TOKEN=
The credentials for the Hosted solution will be provided by your Reseller or by Loway.
You will need:
URI ⇾ the HTTPS address to your QueueMetrics instance
LOGIN ⇾ the Webloader user. The default “webqloader” is preferred
PASS ⇾ the Webloader user password
TOKEN ⇾ where the Uniloader should write the data in the QueueMetrics database (by default leave empty)
Save and exit the file editor.
Restart the Uniloader service with:
service uniloader restart
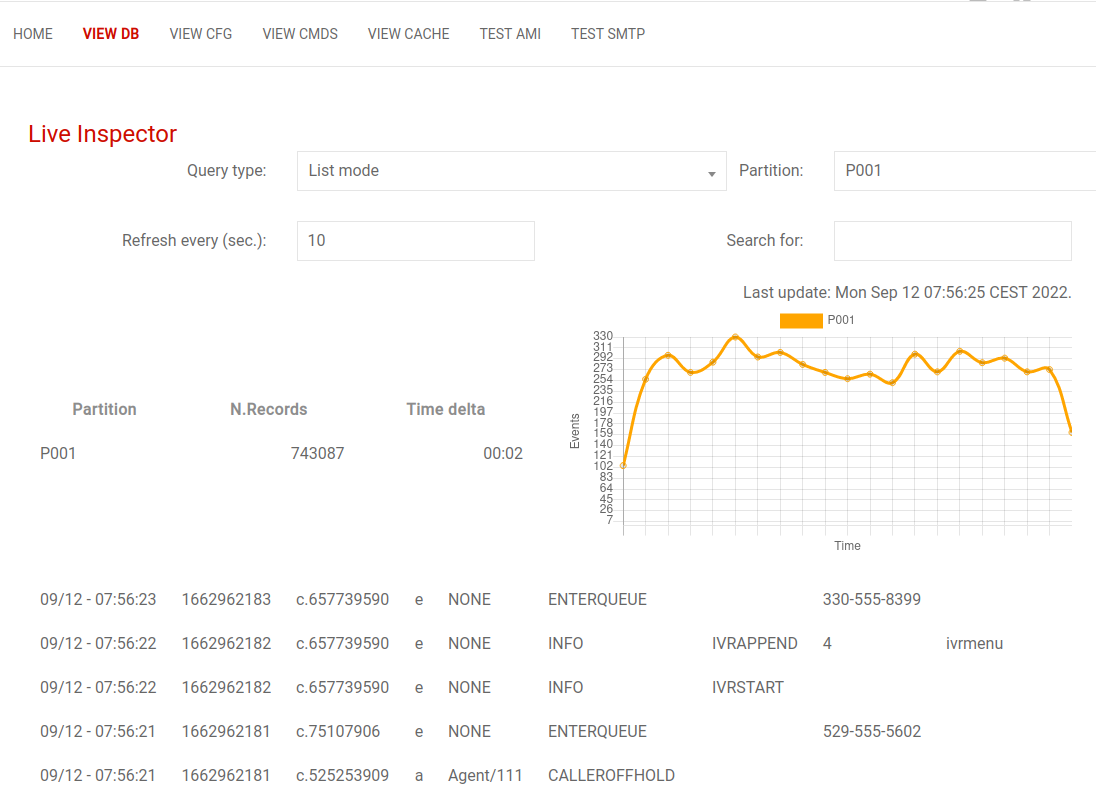
Making sure data is coming trough
Data should start populating your QueueMetrics database at this point. You can check this by opening the QueueMetrics database inspector:
Homepage ⇾ Settings (gear icon in the upper right corner) ⇾ Diagnostics ⇾ Database inspector
In the next tutorial we are going to focus on the Unitracker service, for outbound tracking, as well as the IVR tracking:
Initial QueueMetrics configuration.
QueueMetrics References
QueueMetrics software is available on premise or as a cloud hosted service for FreePBX, Yeastar S PBX, Grandstream, Issabel, FusionPBX and many other Asterisk distros.
For more technical information, please refer to the User Manual.
Visit www.queuemetrics.com for a free 15 days full-featured trial.
keyboard_arrow_left Back